Disclosure: This post may contain affiliate links, which means we may receive a commission if you click a link and purchase something that we have recommended. While clicking these links won’t cost you any extra money, they will help us keep this site up and running! Please check out our disclosure policy for more details. Thank you for your support!
Writing a blog is a wonderful thing.
Some find it liberating – a nice escape to unwind and download. Others enjoy keeping a record of their adventures and experiences. Many enjoy sharing tips and influencing others.
Writing a blog can be a part-time hobby, full-time job, or a monetized business. Whomever you are, you are passionate about what you write and I want to give you the tools you’ll need to be successful. Setting up your blog properly will be your first step to success. Everything after that will be in your hands – create quality content, share appropriately, and wonderful things will start happening. But a good set up is the foundation to your blogging adventure, and those are 6 steps and 5 subscriptions that will set you up for success!
*This post contains affiliate links
STEP 1 – FIND A HOST FOR YOUR SITE
This is what you’re looking for in a good web host:
- easy and flexible tools to build your site, especially if you’re a beginner
- fast loading times, helping rank higher in web searches
- reliability and low downtimes, ensuring your website is always available to your readers
- WordPress hosting
- secure hosting platform, protecting you and your readers
- amazing support, for all those questions that will be popping up!
My hands-down favorite web host is HostGator. My husband and I have several sites hosted on their platform and we could not be happier. They are available around the clock for support, have a 99.9% uptime, meaning that our sites are virtually never down! Their cloud architecture has our sites load up to 2.5 times faster than others, giving us a clear advantage in web searches! Higher loading speed means higher ranking in searches!
Their prices are extremely competitive and they have a array of packages you can choose from, depending on how you decide to set up your site!
HostGator is providing our readers with a special offer on their plans. Use code FRUGALFORLUXURY60 at checkout for up to 60% off any subscription!
STEP 2 – CHOOSE A CATCHY AND RELEVANT SITE DOMAIN
Do not overlook this one. Your site domain will become your brand. You want it to be catchy, easy to remember and easy to spell – stay away from words people mistype. I recommend spending a fair amount of time finding a good name available as a “.com”. Host Gator has a nice tool when you sign up, helping you see which domains and extensions are still available. You will likely need to play around with the tool, but a good domain name is essential!
STEP 3 – DESIGN YOUR SITE
This is the fun part if you’re creative! You will want to pick a WordPress theme that fits your niche. There are so many themes to choose from and many are completely free, right on WordPress. If you are just getting started, a free template can totally work. I started with one before upgrading to a paying theme.
When you purchase a template, pay attention to the following:
- is it a one-time purchase? or will you be charged on a yearly basis?
- is the theme builder including support?
- which features / plugins are included?
The 2 main advantages of purchasing a template are the following:
1- you get a more professional-looking website, increasing your visitors’ trust
2- if you choose a theme aligning with your niche, it will likely come with a bunch of pre-installed features. Many of the developers create plugins specifically for their themes, integrating all of the features you need. Say you are a food blogger, look for food-related themes and most will come with beautiful recipe-publishing plugins. This will make your design work a lot easier and much faster. You will only need to look for and download a handful of plugins, instead of having to build everything from scratch.
Congrats! You are up and running!!
– TAKING YOUR BLOG TO THE NEXT LEVEL –
The last 3 steps are some of my favorite tools, which I can assure you will make a difference in the success of your blog! It is hard to spend more money right now, I totally understand. If you’ve read through my blog, you know that I count every dollars that I spend. But I assure you that those 3 services will be money very well spent!
STEP 4 – LEARN, LEARN, LEARN!
Alright, you now have an up and running site and a couple of article ideas in mind. Perfect! You start writing, share on social media, but struggle to grab readers’ attention. What now?
Like everything else, you will need to learn. And let me tell you, you’re in for a ride. There is SO much to learn in the blogging world. It is an ever evolving sphere and there are many ways of gaining visibility and making money, if that’s of interest! You can decide to learn on your own and as you go. There is absolutely nothing wrong with that! But blogging gets quite complex and I recommend you learn from established and successful bloggers.
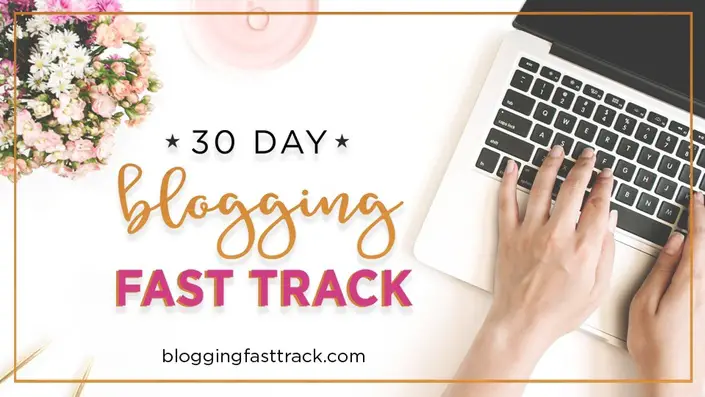
I chose to take a 30-day course by Heather and Pete Reese. They have been blogging for 12 years and earn a very generous income from their blog. I personally chose to invest in my education since I came in with no knowledge and I truly believe this to be the best blogging course around: 30-Day Blogging Fast Track course. I know it looks expensive, but the amount of knowledge they share in this course is worth much more than what they ask for!
If you are not ready to spend that kind of money, I would start with their Free 5-Day Blogging Course. If you like it, you can always join the 30-Day course later. It starts once a month!
STEP 5 – SET UP AN EMAIL LIST
One thing that every blogger wished they had started earlier is their email list. With WordPress, you can include a sign up box, allowing your readers to sign up for automatic emails. As soon as you publish a post, a generic email will be sent out to all of your followers, with a copy of your article. There are 2 things about the WordPress email that I do not like:
- you are unable to custom design those emails. They will be white and blue, unbranded and very generic looking. Every single email will look exactly the same for all bloggers
- those emails do not entice your readers to visit your blog. The entire post, with images, is contained within the email. There is no need for the receiver to ever visit your blog, which drives your site visits and clicks down…
Now, tell me which email is more attractive to you:
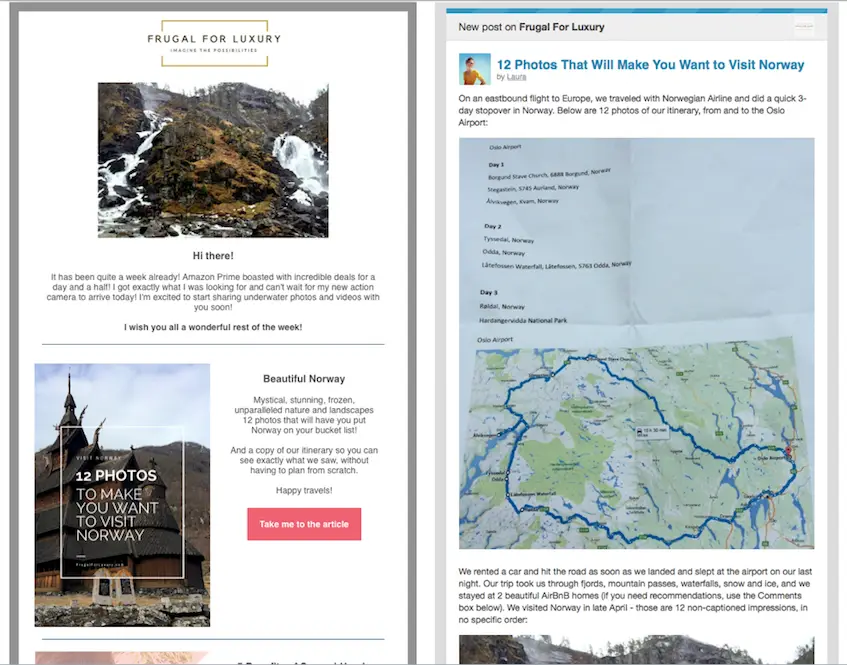
There are several email design services out there and Constant Contact is by far my favorite! It is extremely user friendly and uses a drop and drag system, allowing you to create very appealing emails. You will be able to brand your communication by adding your logo, color scheme, fonts, pictures, links, subject lines, etc. and drive your readers back to your site.
Constant Contact also shares very useful reporting. Learn what works and what doesn’t – which subject lines drive more email openings, which links are opened by whom? It’s all at your fingertips and helps you improve with every email you send out!
One of my favorite features is the Click Segmentation function. I am able to group everyone who clicks on specific links to a category (i.e., travel, lifestyle, frugal living, etc.). If one day I choose to only email my travel readers, I can target them directly!
STEP 6 – BOOST YOUR SOCIAL MEDIA
Once you start your blog, you will want to get it in front of as many eyes as you can. Creating accounts on all social media will help you do just that and you will find that some platforms perform better at bringing followers to your site. Pinterest is one of them!
You will want to invest a vast amount of time learning about Pinterest. I knew very little about the platform and had to do a lot of research. I read many articles, and was tempted to sign up for several courses. Before doing so, I tried a tool that many bloggers recommend: TailWind. This service is a gold mine!!
Let me tell you… if you like efficiency as much as I do, this is for you. Contributing to social media can eat up most of your days. Imagine having to post 2 to 5 times a day on Instagram, Facebook, Twitter, and Pinterest. You can count several hours each day spent on social medias, taking you away from content creation.
TailWind lets you pre-schedule your Pinterest posts! It is a fully-approved Pinterest service, which pins and repins for you, at the times that they know your followers are most engaged. I typically spend about an hour scheduling a month of pins. From there, they are on autopilot. TailWind does all of the work for me and pins the content to specific boards at specific pre-defined times!
If you need a little more convincing, TailWind published an article on the typical results to be expected when signing up for their services.
Recently, TailWind became an official service provider for Instagram! I love it for 2 reasons:
- I can plan my Instagram shares from my desktop, where I have my entire library of photos and can pick and choose my favorites!
- everything is automated and I don’t have to remind myself to post 3 times a day
Since I like to be a bit more spontaneous with Instagram, I typically plan 1 week ahead. While I plan a whole month of Pinterest at once!
This is it! Whether you are starting as a blogger or would like to take your blog to a new level, follow those 6 easy steps and sign up for those 5 subscriptions. I promise you won’t regret the investment:
- HostGator
- WPZoom
- 30-Day Blogging Course (or the Free 5-Day Blogging Course)
- Constant Contact
- TailWind
If you found this article useful, share it, pin it for later! Thank you!
Related articles you might enjoy:
The Power of an Email List and How to Grow It!
Tailwind – A Blogger’s Secret Weapon
If you enjoy reading us, stay in the know by signing up for our newsletter and following us on social media!

3 Comments